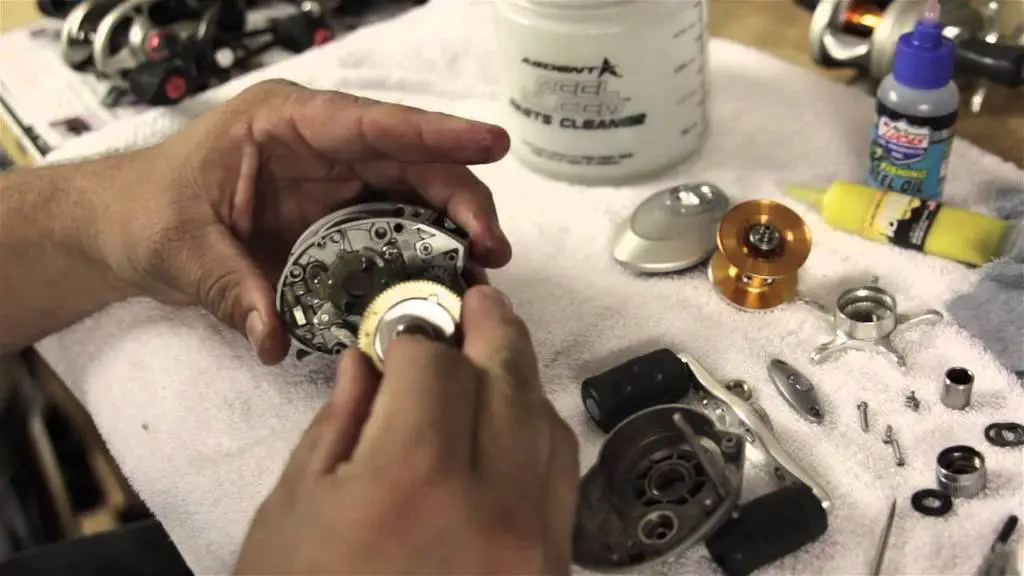
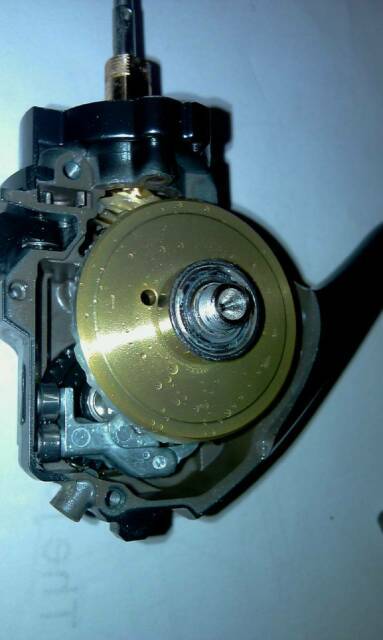
To clean a baitcasting reel, first remove the spool and handle. Use a soft brush to remove debris and dirt, then clean the bearings with a degreaser. Apply reel oil to the bearings and reel grease to the gears. Reassemble the reel, ensuring all parts are secure and properly aligned for smooth operation.
It’s crucial to learn how to clean your baitcasting reel so it will last longer and perform better. Regardless of how intensely (or rarely) you use your reel, it would help if you cleaned it regularly. And if you can’t afford to take it to the shop for regular cleaning, doing it at home is just as effective.
However, you don’t just pour it in water and soap. There’s a proper way to clean a baitcasting reel at home. If you’re wondering how to read on as I show you the procedure and tips to keep your baitcasting reel clean and in good condition.
Table of Contents
Step 1. Ready Your Materials
First, you must prepare all the materials needReed for a clean baitcasting reel, which you can find at home or in the supermarket. Prepare the following:
- Warm Water
- Cotton Pads
- Cotton Swabs
- Reel Oil
- Reel Grease
- Soap and/or Degreaser
- Soft Toothbrush
- Rubbing Alcohol
- Two Soft Towels
Also, it’s best to have a clean and flat surface (like a table) to work on. Spread one of the towels on your surface to keep all the reel parts in one area as you disassemble them.
Step 2. Clean The Reel’s External Parts
Once you’ve readied the materials, it is NOT time to open up your reel to dig in the internal parts. You also need to take into account the reel’s outer surface.
To clean the reel’s outer cover, use the cotton pad. Make sure to wipe its cover in all directions, removing all forms of salt and dirt. If it’s difficult to get in some nooks and crannies, use a toothbrush to brush off any stuck impurities and dirt firmly placed in the reel.
Check this PDF E-book.
Step 3. Dismantle Your Reel
When the reel’s outer part has been cleaned, it’s time to dismantle and clean the internal components. Even if you don’t use the reel often, you should clean it once a month to smoothen the wire’s movement, improving its performance the next time you use it.
Disassemble the reel according to the manufacturer’s instructions, depending on the reel type and makes. Afterwards, follow these steps to clean its insides:
- Press the reel’s key dial, which flips open the cover.
- Separate the spool and line.
- Mix the soap with warm water, preparing it to clean the spool and lines.
- Soak both spool and lines in warm, soapy water. Leave it in for up to ten minutes, then take it out. Dry them using a dry towel.
- Wipe the spool using a soft cloth with cotton pads, which helps with its smooth movement.
- Using cotton swabs or Q-tips with alcohol, wipe the reel’s inside.
- Continue wiping and cleaning the reel’s inner parts three times until you’re sure you reached all nooks and crannies and where all impurities and dirt accumulate.
- Clean the reel’s pinion area using a cotton swab or Q-tip with rubbing alcohol.
- Remove any excess grease with a soft toothbrush.
- Attach the spool back to its place and close the reel’s cover.

Step 4. Clean the Handles
You have to clean the reel’s handles, which are also subject to salts and impurities. After all, you’ll be rolling them with salty and dirty hands, and when left out in the air, the salts and impurities will corrode the reel. Its discharge may also be negatively affected.
Remove the handle by turning it in a counter-clockwise direction. Soak the handle with warm water, then add a degreaser, removing oils and grease.
Afterwards, wipe the handles’ insides using a cotton swab or Q-tip dipped in reel oil. It’s best to do this to prevent corrosion and to give the handles a shinier look.
Step 5. Apply Grease and Oil
Once you’ve cleaned out every part of the reel, you’re done with it! Now, it’s time to do the finishing touches, lubricating and reassembling.
Dry out the entire reel with your dry towel, then lubricate it using reel oil and cotton swabs. Make sure you lubricate all parts of the reel as much as possible but avoid over-lubricating it. Reel oil can help protect the reel and parts by moisturizing it, varnishing, and polishing it for a good look.
- Apply one drop of reel oil to each ball bearing and another drop on the main shaft. Do not apply oil to the anti-reverse bearing. Remove the tension knob and put a drop of oil on its bearing.
- Put a small amount of grease on the gearing and turn the handle for five to ten revolutions to spread it around. You do not want to over grease the gears as this can increase the friction and causes other problems.
After lubricating the reel and its parts, let it dry for a few minutes, then reassemble it according to the manufacturer’s instructions. The handles should be tightened in the clockwise direction.

More Tips on Maintaining Your Baitcasting Reel
Besides these steps, here are some extra tips for cleaning and maintaining your fishing reels well:
- Do NOT put metal against metal when working on the reel, it should be metal to fiber.
- When handling wire clips and springs, use tweezers to prevent them from flying around and getting lost.
- Secure the fishing line before removing your reel’s spool.
- Using one drop of reel oil on every bearing, you can use lighter fluid to clean the reel’s ball bearings.
- Hold the reel properly during disassembly and assembly to ensure all the parts return together accurately.
- Don’t oil the anti-reverse bearing.
- Loosen the drag after each fishing trip to allow the grease to soak back into the drag washer.
You can lay all the reel parts on a soft mat, placing masking tape on each part and numbering it to remember how to place them back together.
Remember - Oil goes on bearings, and grease goes on gears.
Video Instructions
Wrapping It Up
Cleaning your fishing reel isn’t difficult, as long as you have the right knowledge and materials. Do this regularly and after using your reels, and you’re rewarded with equipment to last and perform amazingly for years to come. Making sure your reel is clean means you won’t need to repair it if it gets sand or grit in the bearings.
If this sounds too difficult, you can take your reel to your local tackle store to be serviced professionally.
Cleaning a spinning reel is similar in concept but requires a different method to disassemble it.
Hopefully, this article on how to clean a baitcasting reel at home helped you out. So begin following these steps and tips for a better reel on future fishing trips.
